UEM:
VMware User Environment Manager as the preferred solution for End end-user profile management. UEM deliver a standardized and seamless desktop and application experience to end users across the enterprise. UEM offers personalization and dynamic policy configuration across any virtual, physical as well as to their RDS server environment.
User Environment Manager (UEM) was renamed to Dynamic Environment Manager (DEM) from 9.9 https://www.carlstalhood.com/vmware-user-environment-manager/
Below are the steps to setup the UEM server.
Requirements:
- Shared storage with File server or DFS server to storage windows file in centralized.
- Share path Ex (file server name VDIPRIFILESHARE)
- UEM ADMX Templates GPO bundle (copy in your domain controller server) subfolder in %systemroot%\PolicyDefinitions\ on your Active Directory server.
- Log in your file server and Create 3 folders.
Folder names: UEM_config to save UEM config file .admx
UEM_ profilelog to save users information application settings log file.
UEM_Redirect_profles to save users profile personal data (desktop ,downloads etc.)

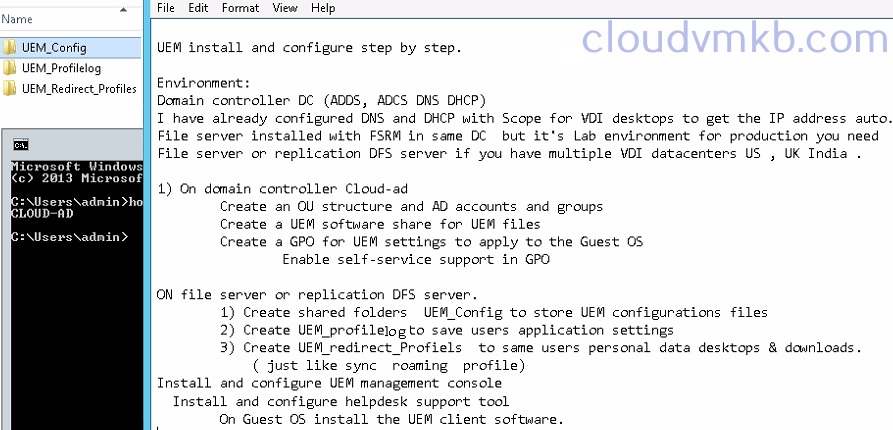
- Create 3 security groups, UEM_admins , UEM_helpdesk , UEM_users.
Then share UEM_config file and assign following permissions.
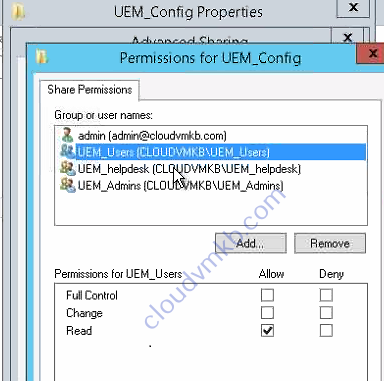
For users read only.
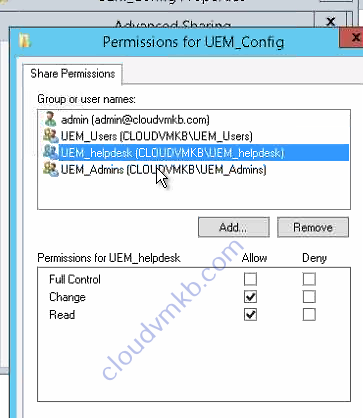
Helpdesk read, change permissions.

For Admins full control.

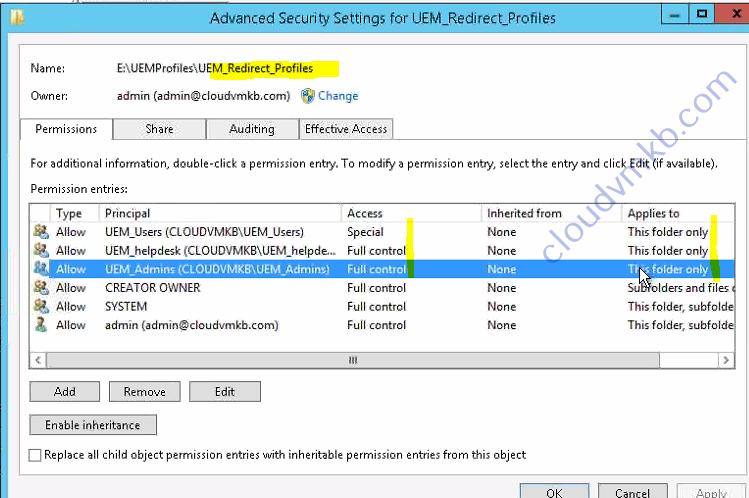
Select Security tab and go to advanced Creator owner.
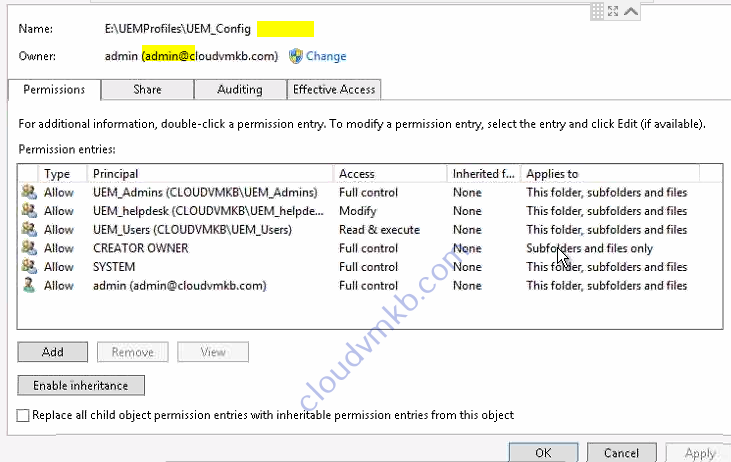

For UEM_profilelogs set permissions as read this folder for users, for admins and helpdesk has full control.
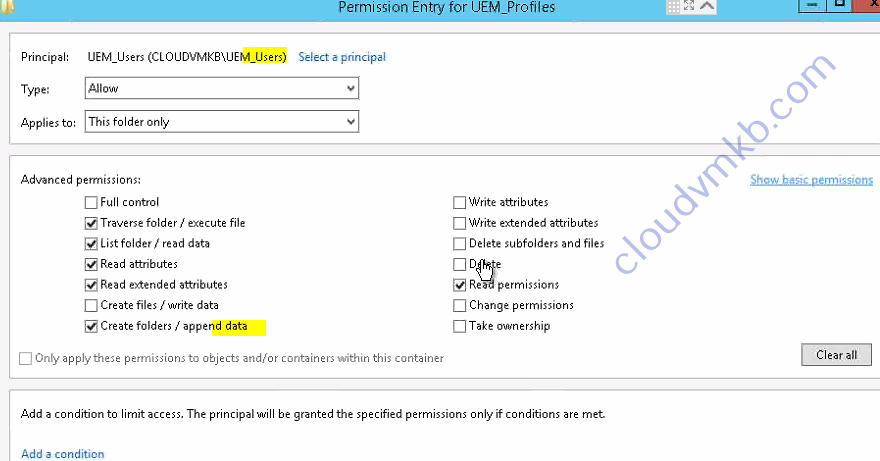

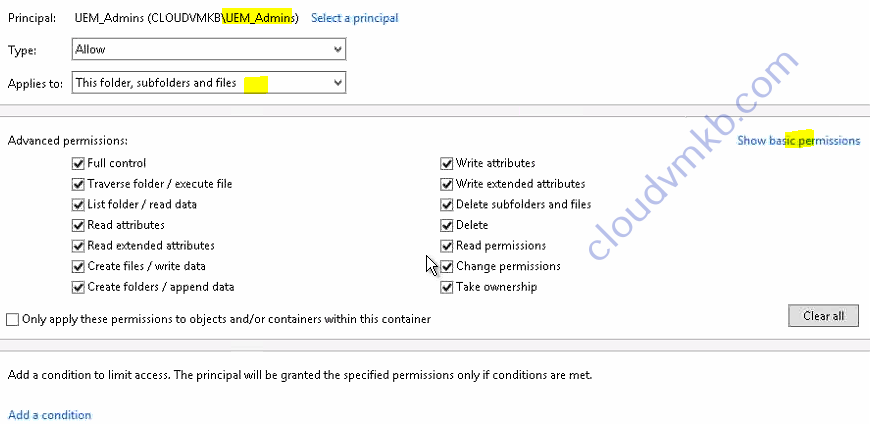
- Set permission’s for UEM _ redirectprofiles
Copy GPO bundle in AD Server.
Copy the .admx files and the en-US folder to the %systemroot%\PolicyDefinitions folder on your Active Directory.
\\ADSERVERname\sysvol\domain.com\Policies\PolicyDefinitions

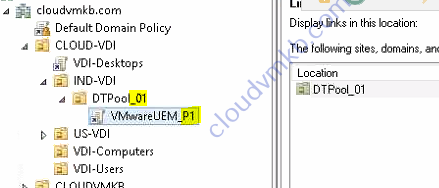
Create GPO for VDI pool in your AD under OU

.
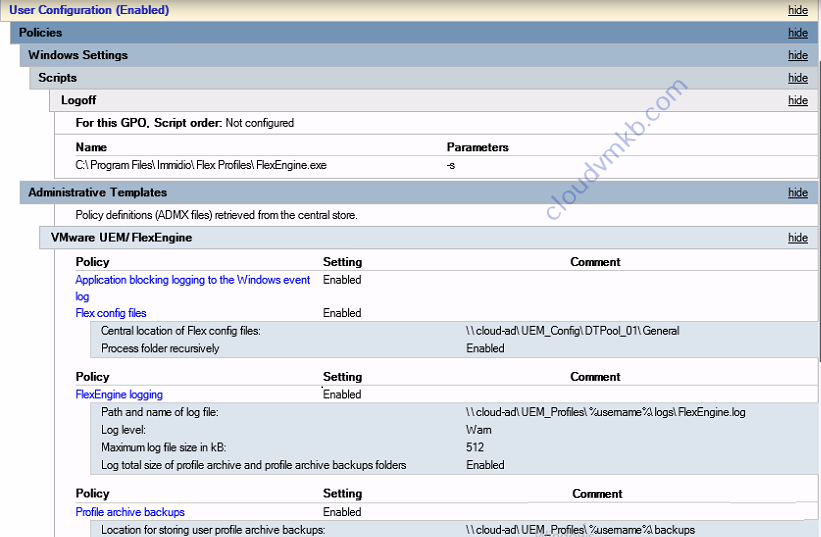
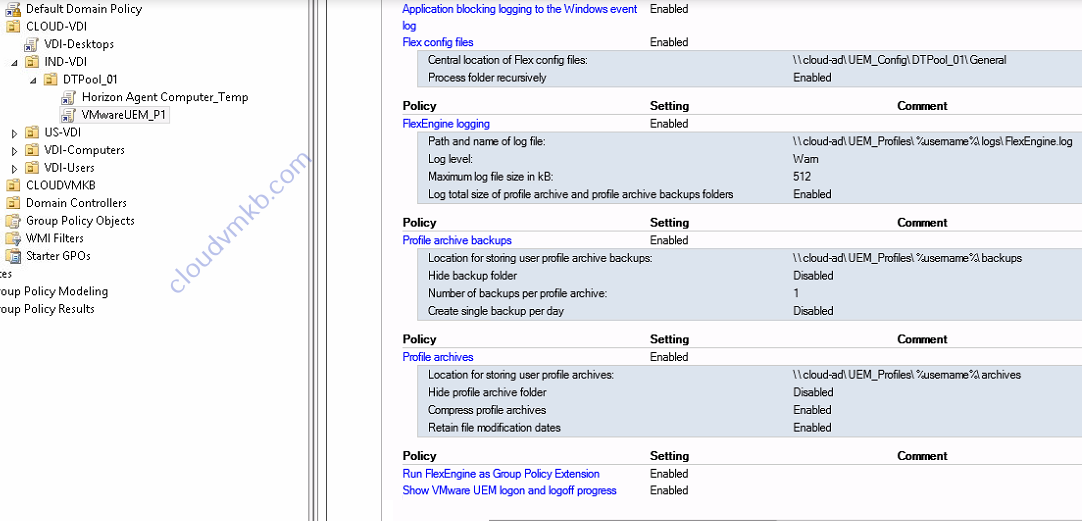
And change GPO settings as follow.


Create a folder in UEM_config for each VDI desktop pools instant or link pool.
Create login script.

Check you GPO has set all perfect.
In Administrator template under system go to logon (Always wait for the network at computer startup and logon) Enabled
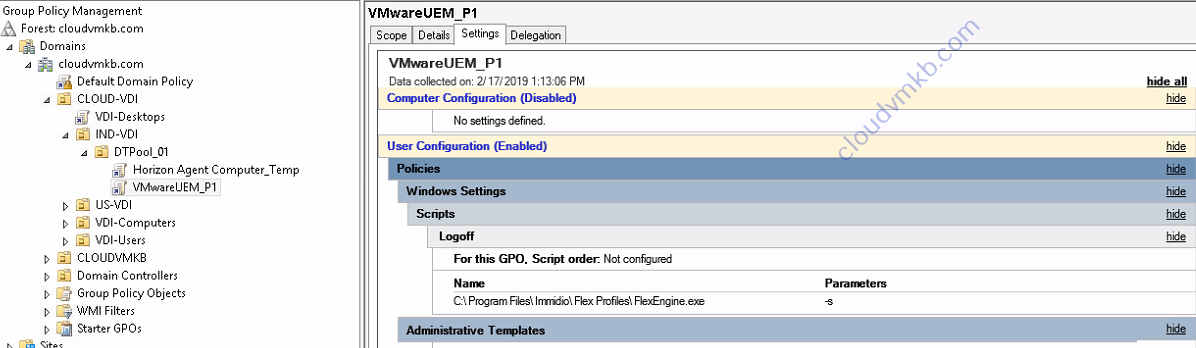

The Complete GPO look like this.
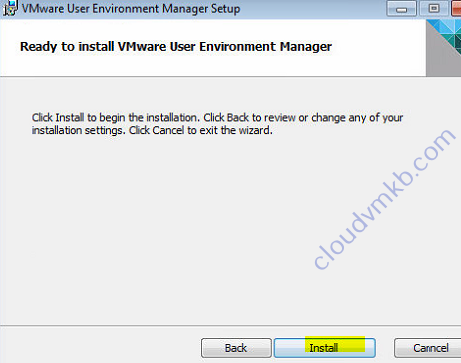
Next Install UEM Manager server to provide configure console for UEM.
Install and configure UEM manager.
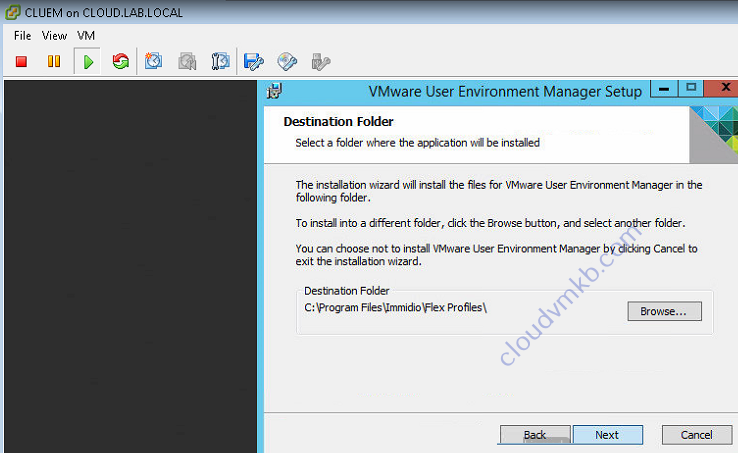
Click Next to select custom install

Then select UEM management console .


Next configure UEM profile for one VDI pool.
Launch the UEM Management Console from the Start Menu.

Enter the path for UEM_config to same configure files. and click OK.
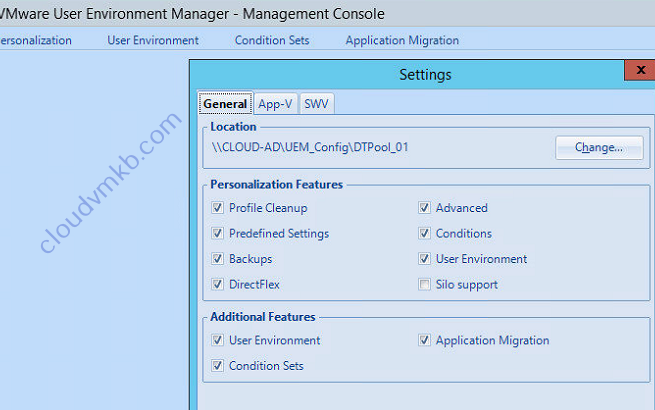
In the Personalization Tab click Easy Start.

Select your version of Office, and click OK. Office 2013 and Office 2016.

Click OK. Configuration file will be create in your shared directory.


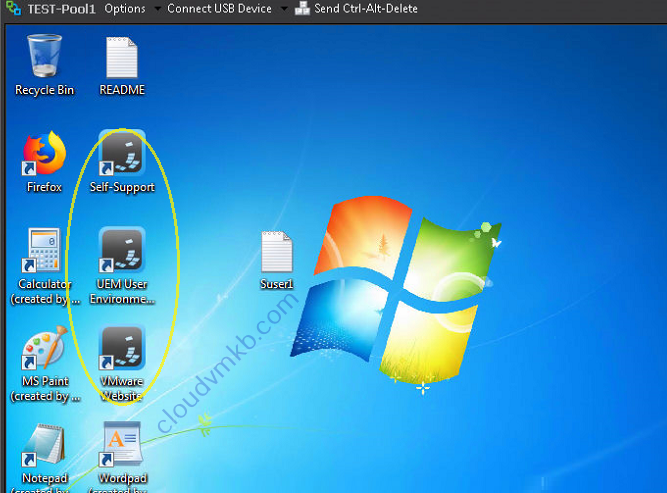
Next install agent on your VDI master Image.

Select Custom.

Select UEM FlexEngine. click next


Next to install agent.
Restart your VDI master desktop. And check the configuration.

Configure Helpdesk support.
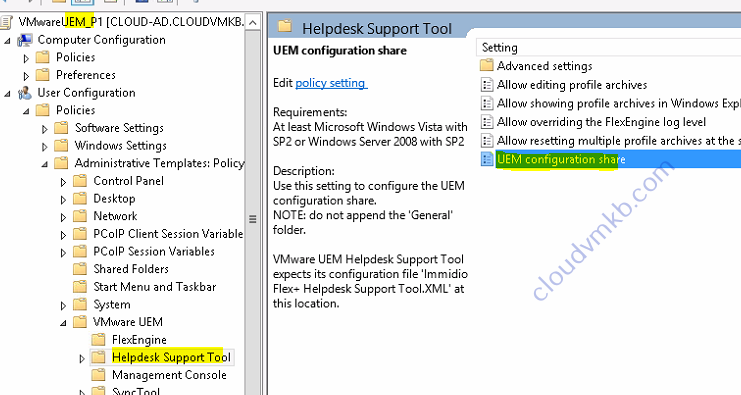
Enable UE configuration share.
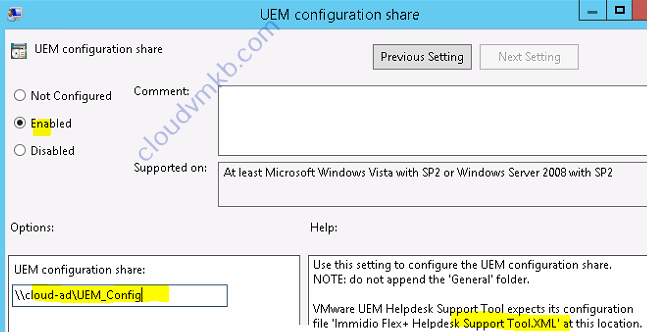
It will help to restore existing setting by user end without admin support.
Once the Helpdesk Support Tool is installed, you can launch it from the Start Menu, search for users, and then perform operations on the archives and restore your settings.
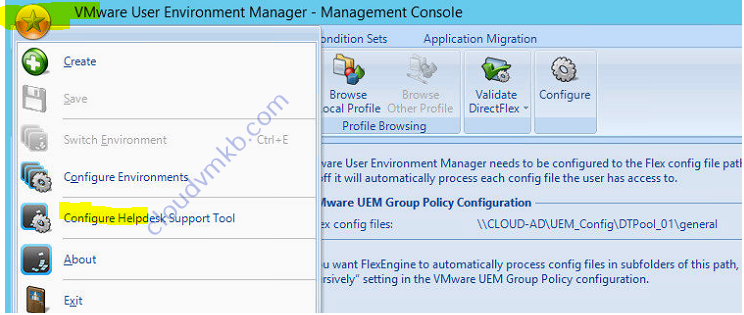
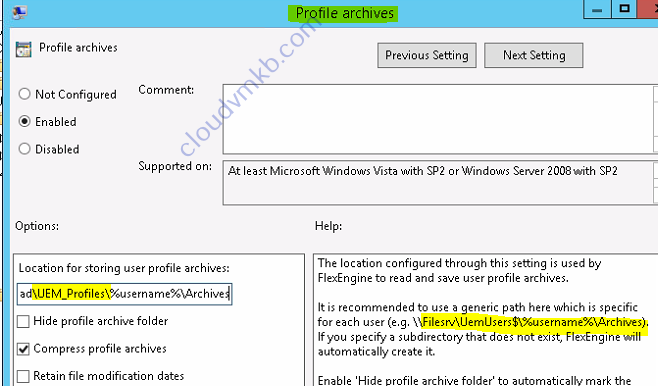
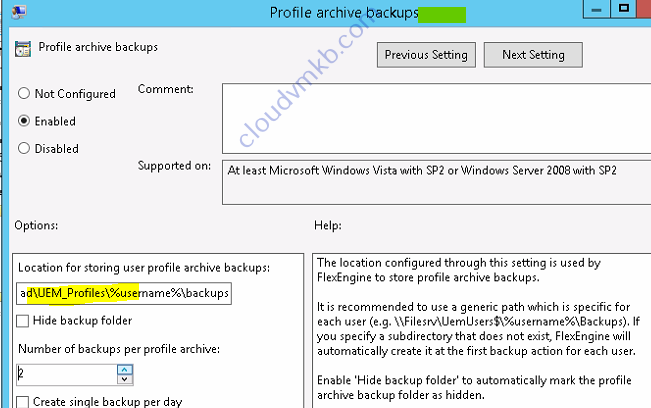
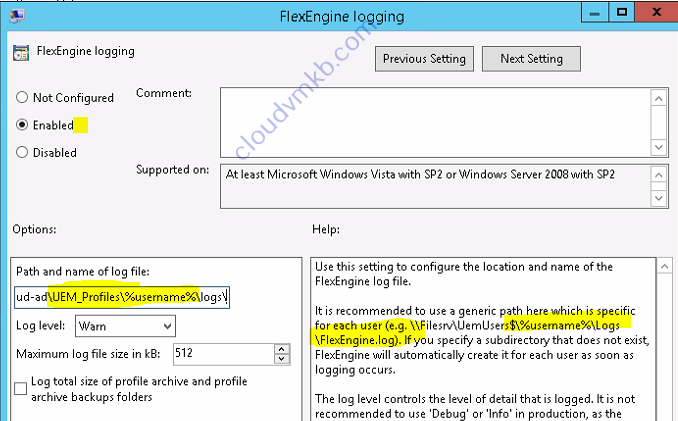
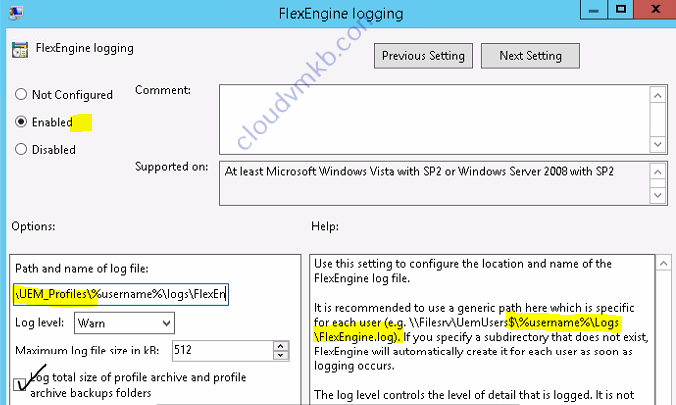
Set the perfect UEM shared paths.

Next try log in you VDI desktop and check the UEM.Thank you.
Hope this will be informative for you, Thank you for Reading !